January 2015 Update: this is still working! Thanks for all the people who are visiting this page: you’re doing a great job fixing your phone!
After about a year of procrastination, I decided to finally fix a nagging problem: the power button on my iPhone 4 was broken. It felt limp and would not respond to a press. This might seem like a small problem, but considering that there’s no way to lock the iPhone any other way, it’s mightily irritating. Every time you put the phone in your pocket, it’s still on, so you have to be very careful not to touch the screen. It make handling it very clumsy and I’ve let it slip more than once.
Luckily, however, the iPhone 4 is programmed to start up automatically when you insert the charger. If this weren’t the case (as I feared when the problem first manifested itself) you’d be in constant fear of a low battery: one battery-drain and the phone would be bricked.
Living without your phone is difficult. So when T-Mobile told me I’d have to miss it for about two weeks, I decided to wait for a convenient time. It turns out, however, that there’s never a convenient time to miss your phone. Last september, my warranty ran out. So, I decided to take matters into my own hands.
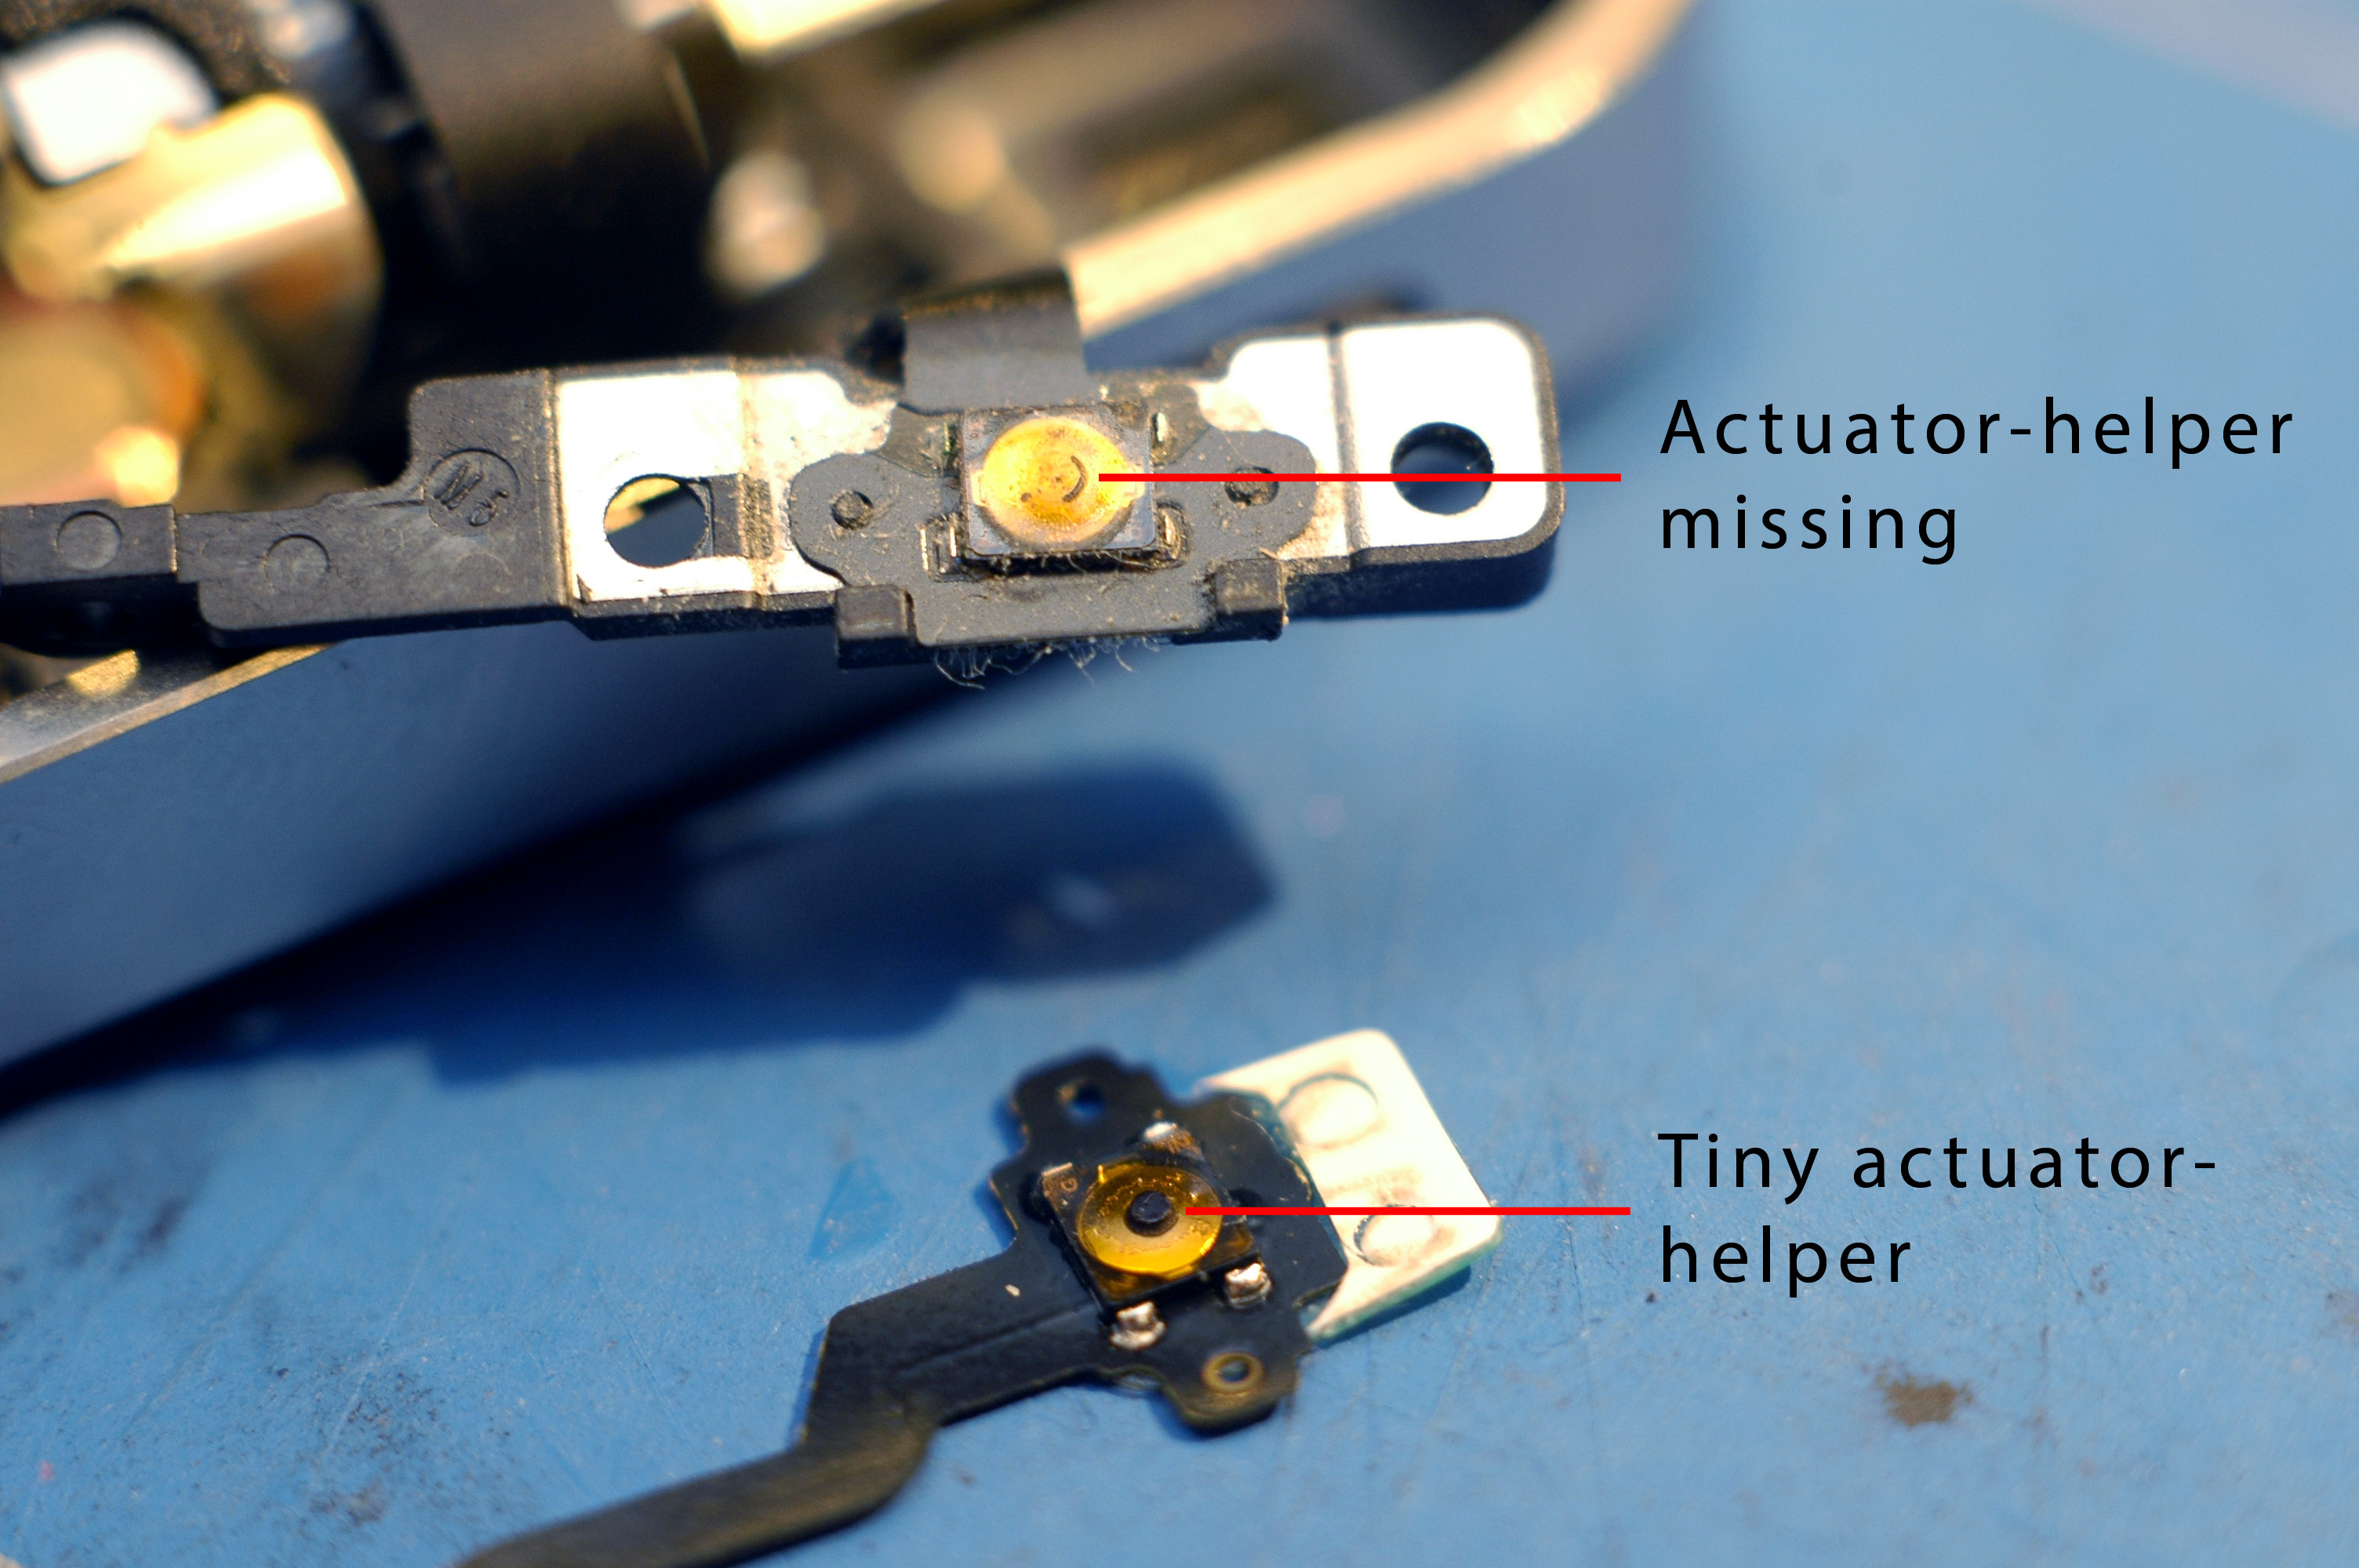
Here’s the problem: Apple uses a tiny 3x3mm tact-switch (Alps maybe?) with an even tinier (±1x1x0,5mm) actuator-helper moulded (?) onto the switch. The actuator-helper makes sure the force from the (beautifully machined) power button itself is transferred nicely to the middle of the disc-spring of the button so it makes a snappy “click”-sound and responds okay electrically.
However, on my iPhone, the actuator-helper came loose and was lost (probably somewhere in the phone, haha). The yellow film on the switch is kapton (polyimide), which is a very hard plastic to stick anything to except PI itself. The actuator-helper itself seemed to me like some other plastic, like ABS/PC/PC-ABS. Like I said: tiny error, tiny problem. Big impact on daily use.
I’ve heard more people about the same problem, so here’s how I fixed it:
- Get this part from your masters at DealExtreme. It’ll take some time to arrive. Get some coffee.
- Follow the great iFixit tutorial for replacing the powerbutton itself up to the last page. I found that it’s not necessary to take out the front-facing camera.
Be very careful. There are many things that can go wrong, as the iPhone is made up of a lot of very delicate springs, bushes and screws. Use a magnetic screw mat. - Use a scalpel or other knife to separate the yellow kapton tape from the original button. Be very careful not to lose any of the disc-springs inside. Also make sure no dust gets inside.
- Do the same for the donor-button. Put the yellow tape (with the actuator helper) on the original button. Make sure all disc-springs are inside and that everything aligns nicely.
- Press the tape firmly; it’s not meant to be reused so it might come loose after a while if not pressed right.
- Re-assemble the phone, carefully following the iFixit tutorial in reversed order.
- Resync time and iMessage. Enjoy your fixed power button.
Although it would be nicer to replace the whole switch or the whole cable assembly, my approach takes a lot less time (and is less risky). Besides, the cable assembly also holds several sensors and a microphone. I didn’t trust the DX cable quality enough.
All-in-all it took me about two hours to take the phone apart, decide how to fix the problem, fix the button and putting it all back together. This is not an easy repair. If you’ve never fixed something like this before, don’t do it!
I hope this helps anybody out there. I’ll let you know how it holds!

